• Skip to primary navigation
  • Skip to main content
  • Skip to primary sidebar

woodworkreviews.com

  • Home
  • Woodworking
  • wood
  • flooring
  • lumber
  • plywood
  • timber

wood

UNLOCKING IMPOSSIBLE Cuts: I Built the Ultimate Lathe Jig

Woodworking close to-up photographs captures problematic timber textures and craftsmanship info the usage of shallow depth of area, warm lighting, and macro compositions. Position your problem under vivid, herbal mild, use f/2.8 to f/5.6 aperture, and emphasize sawdust debris for actual workshop surroundings.

What Makes Woodworking Photography Compelling

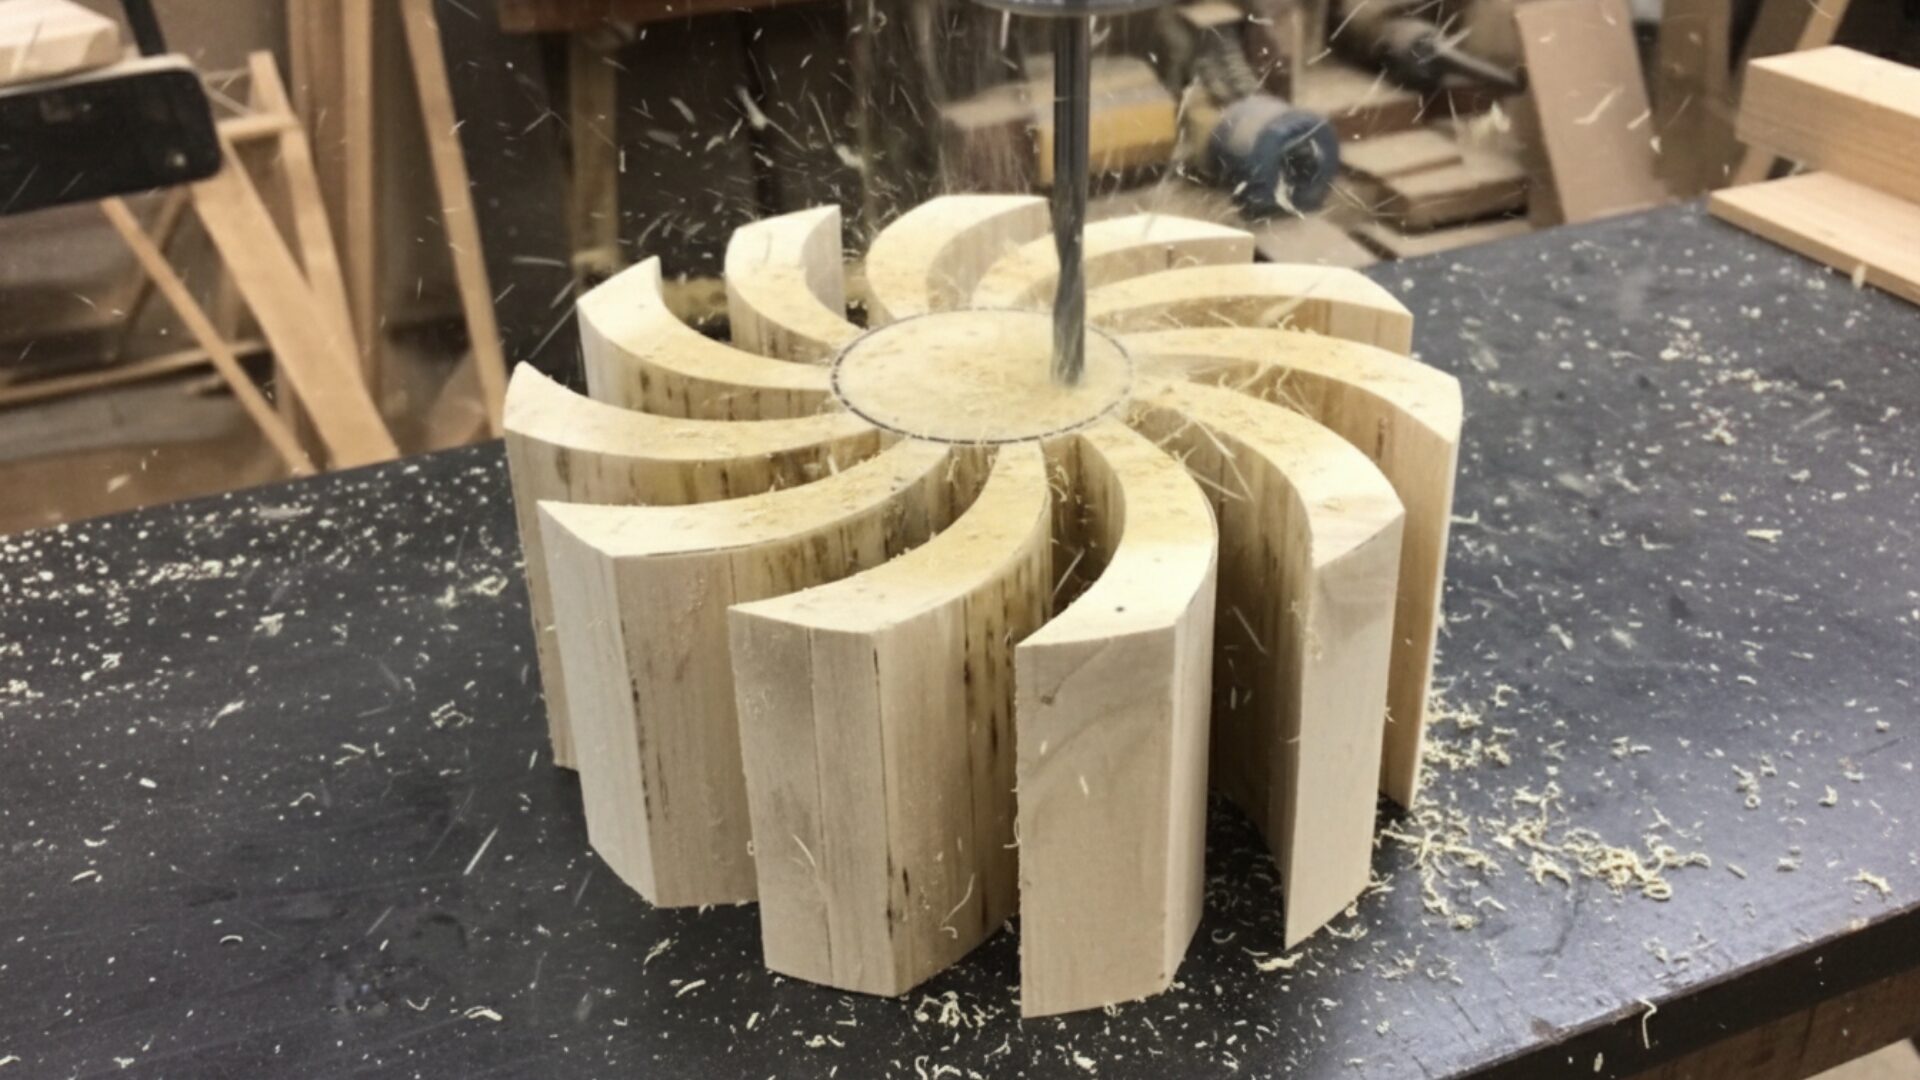
You comprehend that feeling when you’re sanding a chunk of all rightand the grain truly pops under the workshop lighting fixtures? That’s exactly what splendid wood texture pictures captures. The magic lives in those tiny details: the sawdust catching sunlight, the freshly machined ground, the honest imperfections that show a person’s hands created some thing actual.

Professional workshop product photographs are not about sterile perfection. They’re approximately storytelling via texture, moderate, and actual craftsmanship moments.

Lighting That Brings Wood to Life

Forget complicated setups. Natural light wins whenever for wood ground pics. Position your workpiece near a window or use high-key lighting fixtures that creates the ones lovely highlights with out harsh shadows.

The golden rule? Warm tones make wooden appearance alive. Cool lights makes it appearance dead. Your virtual camera must choose up those rich yellows and browns that make viewers need to gain through the show display screen and make contact with the grain.

Direct lighting works wonders for emphasizing surface texture. Those mild versions in machined wooden come to be dimensional below vivid slight. Even higher, those floating sawdust debris remodel into visual gold dust.

Composition Techniques That Work

Shallow depth of field separates amateurs from pros in woodcraft element images. Set your aperture among f/2.Eight and f/5.6. Your subject remains razor sharp at the same time as the historical past melts proper right into a easy blur that screams “professional workshop.”

Get near. Really close to. Fill the body with texture until site visitors can almost sense the wooden grain beneath their palms. Leave strategic horrible space in which the ones tiny wooden debris can float, adding authenticity.

The mild vignette round edges? That’s intentional. It draws eyes exactly where you want them whilst preserving that instructional snap shots aesthetic that teaches and sells simultaneously.

Technical Settings for Perfect Shots

ISO four hundred to 800 continues things crisp without introducing noise. Shoot in RAW format due to the fact you’ll want to enhance the ones warmth tones in submit-processing. White balance topics pretty with wooden, so check exclusive kelvin temperatures between 3500K and 5000K.

Manual focus beats autofocus for macro paintings. Your digital camera could likely hunt for the incorrect detail, but you understand exactly which grain line merits hobby.

Common Mistakes to Avoid

Overexposing highlights destroys texture element. Those brilliant spots need to glow, now not blow out absolutely. Similarly, over-sharpening makes timber appearance plastic. Real craftsmanship has subtle softness inside the proper locations.

Don’t clean up every speck of sawdust. Those debris show authenticity. They whisper “this was without a doubt made via human hands” louder than any caption ever need to.

Making Images Work Harder

Great sawdust macro pictures serve double responsibility as advertising gold and portfolio quantities. They display ability, report manner, and create emotional connections with capability customers who price hand made work.

Include scale references subtly. A pencil mark, a finger in element in frame, or device marks provide context without cluttering composition.

Remember, these photos are not simply quite pics. They’re visible evidence of craftsmanship, fine assure documentation, and effective profits gear wrapped into one perfectly centered frame.

FAQ

What aperture works nice for woodworking close to-up pics?

Use f/2.Eight to f/five.6 for nice shallow intensity of discipline. This maintains your wood surface sharp at the equal time as blurring workshop backgrounds, developing expert-searching separation and emphasizing texture info.

How do I photograph wood texture with out harsh shadows?

Position your issue underneath diffused natural mild from domestic home windows or use high-key lighting setups. Avoid direct flash, which creates unflattering shadows. Warm-toned lighting among 3500K and 5000K complements herbal timber hues superbly.

Should I do away with sawdust earlier than taking workshop product photographs?

No. Strategic sawdust particles upload authenticity and visible interest to woodcraft detail pics. They display right craftsmanship and create dynamic compositions even as stuck in proper lighting.

What digital camera settings capture wood grain detail top notch?

Shoot in RAW format with ISO 4 hundred to 800, use guide attention for precision, and keep shutter speeds above 1/a hundred twenty five to avoid movement blur. Slightly underexpose by means of manner of 1/three stop to preserve highlight element in brilliant wood surfaces.

Master the Realistic Woodturning: Advanced Techniques for Stunning Sculptures


Advanced woodturning strategies contain unique interior shaping of hollow wooden forms the use of specialized gear, managed intensity slicing, and proper lighting. Success requires expertise grain route, maintaining uniform wall thickness, and using sound and feel to manual your cuts.

What Makes Hollow Form Woodturning So Challenging

Hollow shape woodturning separates hobbyists from masters. You’re now not simply shaping the outdoor anymore. You’re reaching deep right into a vessel with constrained visibility, counting on touch, sound, and instinct to create some thing lovely from the inner out.

The real assignment? You can not see what you are doing half of the time. Your gear disappear into darkness. One incorrect flow and you have were given a pile of expensive firewood.

Essential Tools for Interior Vessel Shaping

Forget your fundamental gouges. Hollow vessel paintings demands curved scrapers, lengthy-reach equipment, and articulated reducing systems that bend around corners like they are studying your mind.

Your tool relaxation turns into your lifeline. Position it close to the opening, lock it down solid, and alter continuously as you work deeper. Any wobble translates directly into your cut, and now not in an awesome manner.

Critical gadget includes:

  • Specialized hollow form tools with curved shafts
  • Adjustable dull bars for deep indoors paintings
  • Precision calipers for wall thickness measurement
  • High depth venture lights located immediately overhead

Reading Wood Like a Professional Turner

Maple and beech look harmless enough, sitting there on your lathe. But every piece speaks in case you know a way to listen. Growth rings inform you wherein the timber will face up to. Color variations trace at density adjustments that’ll seize your device.

Professional turners stop the lathe continuously. They’re measuring, feeling, tapping the walls to hear thickness. A skilled hand is aware of when a wall sounds right, commonly around three/eight inch for maximum vessels.

The Interior Finishing Technique That Changes Everything

Here’s what no one tells novices: the interior subjects just as a great deal as what human beings see. Maybe more. A rough interior creates strain points. It weakens the entire structure and screams newbie paintings.

Start with aggressive cuts to establish your form. Then transfer to lighter, shearing cuts that depart glass clean surfaces. Your final passes need to whisper across the timber, barely touching.

Lighting makes or breaks this procedure. Mount your assignment lamp so it floods the opening. Shadows conceal tear out, device marks, and skinny spots that’ll hang-out you later.

Common Mistakes That Ruin Hollow Forms

Rushing kills extra portions than another mistake. You can’t pressure hole form paintings. The wood will win each time.

Going too skinny sounds incredible till your vessel cracks in the course of very last sanding. Aim for constant thickness as opposed to showing off. A 1/four inch wall it’s uniform beats a paper thin wall with versions.

Tool catches show up while you lose attention. Keep your gear sharp, your rest close, and your mind gift. One trap can wreck hours of careful work.

Why Grain Direction Controls Your Success

Cutting towards the grain in a hole shape is requesting catastrophe. The wood will tear, chip, and typically make you question your lifestyles picks.

Watch your growth earrings. They’ll tell you which of them course to reduce. Listen to the sound of your tool. Smooth and quiet approach you are doing it proper. Chattering or catching means adjust immediately.

Turning Sound and Feel Into Precision

Master turners develop nearly supernatural recognition. They feel vibration changes thru the device deal with. They listen pitch shifts that suggest wall thickness. They scent when wooden starts offevolved overheating from friction.

This sensory connection takes years but begins on day one. Pay attention to everything. Your frame knows more than you believe you studied.

Creating Sculpture Quality Finished Pieces

The distinction among a became bowl and a timber sculpture? Intention and refinement. Every curve need to float obviously. Every transition need to feel planned.

Sand regularly from 120 to 400 grit minimum. Some turners visit 800 or higher. The indoors gets the same attention as the outdoors, despite the fact that maximum humans will never see it.

Your finish preference topics exceptionally. Oil finishes enhance grain. Lacquer offers safety. Wax gives diffused sheen. Choose based totally at the piece, now not what’s easiest.

FAQ

How long does it take to master hole form woodturning?

Most woodturners want 2 to three years of constant exercise to provide first-class hollow bureaucracy reliably. Basic competency develops inside 6 months, but studying deep vessels with narrow openings requires sizeable enjoy know-how device behavior, timber motion, and interior shaping techniques.

What’s the right wall thickness for hollow wood vessels?

Professional turners maintain wall thickness among 1/four and three/eight inch for maximum hollow forms. Larger vessels can guide barely thicker walls, at the same time as smaller pieces require thinner profiles. Consistency topics greater than absolute thickness. Use calipers frequently and intention for much less than 1/sixteen inch version during.

Why do professional turners use assignment lights throughout hollow paintings?

Direct overhead lights eliminates indoors shadows that disguise surface defects, tool marks, and threatening thin spots. Quality lighting lets in turners to screen wall thickness visually, spot grain tear out without delay, and maintain constant slicing intensity. Without proper illumination, hollow shape paintings becomes dangerously unpredictable.

Can novices attempt hollow shape woodturning thoroughly?

Beginners ought to master basic spindle and bowl turning earlier than trying hollow paperwork. Start with shallow vessels that have extensive openings, use sharp tools, and work at slower lathe speeds. Take classes from experienced turners who can teach right device presentation and trap prevention. Never rush the gaining knowledge of manner.

Ted’s Woodworking Plans 16000 DIY Projects Made Simple

Woodwork lovers might find what they need in Ted’s collection. Over sixteen thousand detailed guides sit ready for anyone keen on building things by hand. These plans work well whether you are just starting out or have spent years at the bench. Furniture pieces show up alongside outdoor structures and small decorative items inside homes. Almost any idea someone could want to make is likely hiding somewhere in the set.

Ever wonder what Ted’s Woodworking is? It’s a big collection of do-it-yourself wood projects, all laid out in PDFs. Instead of guessing how things go together, you get clear drawings plus written steps. Video guides come along too, showing exactly how each part fits. Because everything breaks down into small actions, beginners can keep up without stress. Some folks might think it’s only for experts, but that’s not true here.

Furniture ideas sit alongside backyard builds, storage fixes, among thousands of others – over sixteen thousand total. Plans stretch across categories without running out of options.
Watching someone do it can make tough parts clearer. A moving example shows what words miss. Seeing the motion helps spot small details. Steps flow better when they play out in real time.
Folders of paper sheets ready when screens fail. These stay useful without power nearby.
Step-by-step help that’s easy to follow, using pictures that show exactly what to do.
Starting with a tiny birdhouse or going all the way to an entire deck outside – Ted’s Woodworking walks beside you through each step. Project after project, it hands you clear direction without confusion. From first cut to last nail, help stays close. Whatever you decide to build, support shows up exactly when needed.

Built for simplicity, that is why folks keep coming back to Ted’s Woodworking. These plans skip the clutter – no fancy gear needed. Most setups work fine even in tight spaces like a garage corner. Picture starting small yet nailing solid builds every time. Fewer tools mean less hassle, more progress. Quality doesn’t demand square footage or deep pockets here.
Building from these plans costs less than purchasing ready-made furniture. With clear step-by-step directions, crafting pieces that fit your space becomes possible without spending much. What you get is something made just for your home, built by you, at a fraction of the price.
Furniture built by hand brings a quiet kind of pride. Success stories pour in from makers who’ve shaped raw materials into sturdy shelves, cozy chairs, standing desks – each piece tied to growth, confidence, learned precision.
Start your journey

Jump right into Ted’s Woodworking by buying a lifetime pass. This single payment opens every one of the 16,000 plans without delay.
Pick your favorite builds right there on the page. Grab the blueprints straight away through downloadable PDFs.
A place for everything makes work move without hiccups. Tools stay close when tasks call. Materials wait where hands can reach fast.
Start by checking the diagrams – every build comes with them. Measurements sit right beside each detail you need. Material lists show up early, so nothing gets missed. One piece follows another, keeping things moving smoothly.
Starting out might seem tough, yet taking it one piece at a time builds skill naturally. A steady hand grows stronger when each cut teaches something new. Confidence comes not from rushing, but from doing things right, slowly. Mistakes fade when patience stays close. Anyone can shape wood well – just keep going.

Tips for Successful DIY Woodworking To make the most of your plans:
Picking wood? Think pine if it is something light. Oak works when strength matters more. Cedar shows up best outdoors, where weather tries its worst.
A single wrench often does more than expected. Some jobs need only a drill, nothing else. Most tasks get done when you pick the right tool first. A hammer, a saw, sometimes that is enough. Power helps, yet simplicity wins now and then.
Avoid accidents by using proper protection every time you work. Stay safe because rules exist for a reason inside workshops.
Wait your turn. Big tasks need hours, sometimes days. Pay close attention to each step along the way.
A solid finish begins long before the last brushstroke. Each choice along the way shapes how well it holds up. Staying alert to details keeps things strong. Thoughtful steps lead to results that look right. Safety grows from consistent care, not luck.

For about sixty-seven dollars, you can get into Ted’s Woodworking – sometimes less if there is a short-term deal going. Should you change your mind later, refunds are an option. That means testing everything without pressure.
Building these projects cuts costs compared to buying ready-made pieces while improving how you work with wood. One moment you’re measuring, next you’re sanding – each step sharpens ability.
Frequently asked questions

Got questions about getting Ted’s Woodworking plans? Here’s how it works. Buy a membership – right after, you can grab every one of the 16,000 designs straight to your device. Everything comes as PDFs, ready whenever you are.

Not at all. These designs work just fine in tight spaces using only basic gear.

Starting out might feel tricky, yet these plans walk you through each part slowly. Every stage comes with clear drawings that show exactly what to do next.
Q4: What types of projects are included?
Furniture comes first when thinking about sheds. Decks follow, tied closely to how home décor shapes outdoor spaces. Projects outside grow from these pieces, linked by purpose rather than plan.

Got your cash back if things don’t work out? Most plans give you two months to decide. That stretch feels fair, right?

Got videos? Every premium plan unlocks access to more than 150 of them. From start to finish, they guide you step by step.

Got a printer? Every plan can be saved then printed whenever needed. That way you have them even without internet.

What’s the price tag on a membership? Around sixty seven dollars to begin, sometimes less when deals pop up.

Primary Sidebar

Categories

  • flooring
  • Great offers
  • lumber
  • plywood
  • timber
  • wood
  • woodboards
  • Woodworking

Recent Posts

  • Woodworking project ideas for your beautiful outdoors
  • Weekend woodworking project ideas you can make on a budget
  • Small wall mounted wooden shelf and floating shelf design ideas you can make as weekend projects
  • Contemporary wood furniture and wood décor pieces ideas to change the look of your living spaces
  • These Brilliant Wooden Bike Design Ideas Will Make You Want to Get Crafting
  • Minimalist wood furniture and wood décor pieces ideas you can make as a beginner
  • Selected wood furniture and wood décor pieces ideas you can use as an income source
  • Wooden seating furniture ideas you never knew you needed
  • Small wood furniture pieces ideas you can make at home for high profit as a woodworker
  • Outdoor wood furniture and wood décor pieces ideas
  • Useful wood furniture and wood décor pieces ideas you never knew you needed
  • Woodworking Project Ideas for Beginners and Intermediate level woodworkers

  • Home
  • Woodworking
  • wood
  • flooring
  • lumber
  • plywood
  • timber